Hello crafty peeps
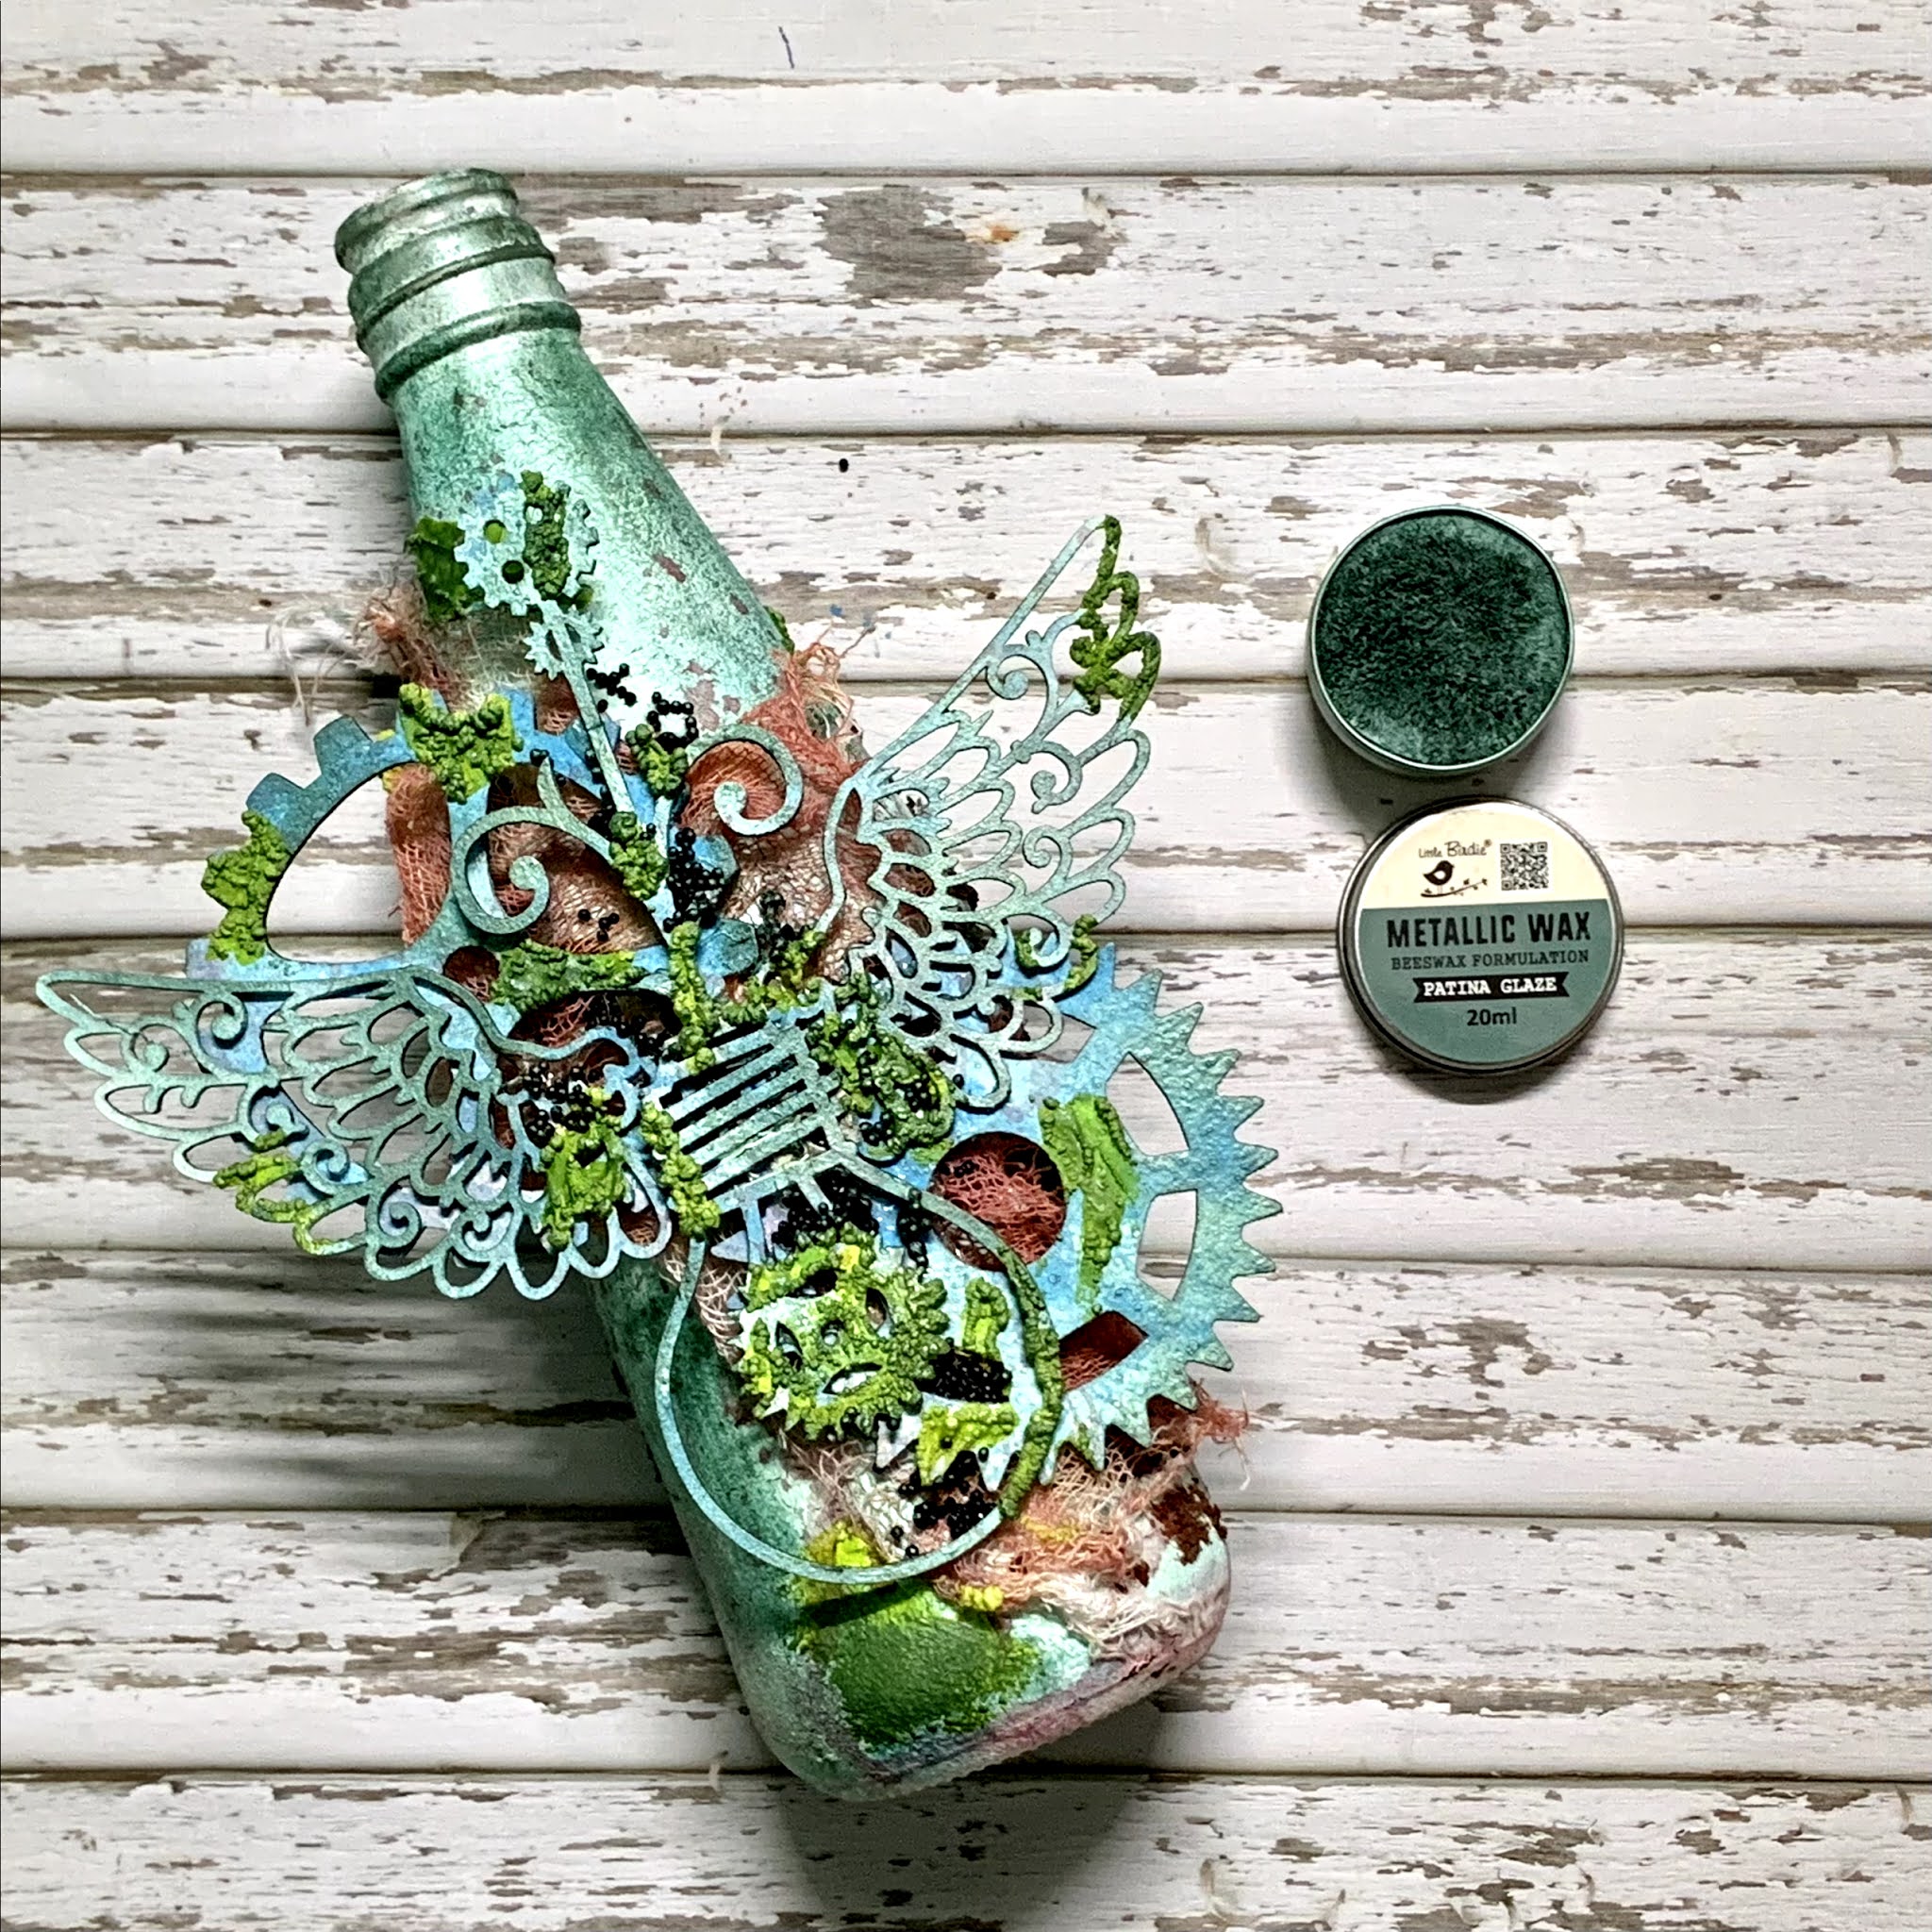
Priya Satish this side to inspire you on the ongoing Itsy Bitsy Mixed Media Challenge. I have altered a mundane looking ketchup bottle to a beautiful mixed media bottle. Hope you are inspired.

Here's the synopsis of the step by step tutorial using the awesome products from Itsy Bitsy.
Step 1:
Clean the bottle with spirit and apply a coat of White Gesso. Allow it to dry.

Step 2:
Sponge dab the Little Birdie Home Decor Collection Chalk Paints - Snow, Sailing Sky and Muted Teal. As it dries you can see tiny cracks coming up. This adds great texture to the background.

Step 3:
Apply the Little Birdie Stone Texture Paste Chocolate Fudge through Little Birdie Bricks Stencil with a palette knife. This creates a more amazing background for the mixed media work.

Step 4:
As the bottle is drying, the next step is to prepare the embellishments for layering. Dab the Little Birdie Chipboards Cog Planter, Ornate wings and Retro Cogs with Little Birdie Home Decor Collection Chalk Paints - Blue Spa and Muted Teal.

Step 5:
Sprinkle Little Birdie Colour Splash Paprika on the chipboards.

Step 6:
Spray colour the bricks on the bottle and add splashes with Paprika.

Step 7:
Stain a small piece of Little Birdie cheese cloth with Paprika. This cheese cloth creates more interest when the chipboards are layered.

Step 8:
Layer the cheese cloth and chipboard embellishments aesthetically and adhere them with Little Birdie Heavy Gel Medium.

Step 9:
Add a layer of Little Birdie Embossing Paste Avocado Smoothie here and there. The paste is literally smooth as the name suggests. But when exposed to heat gun, the texture is just unbelievably amazing. It gives a very grungy look which adds great value to the layers.

Step 10:
Add Little Birdie Metal Beads Black with heavy gel. Then Highlight the textures with Little Birdie Patina Glaze. This glaze transforms the whole textures to next level.
Step 11:
Dry brush with White Gesso to add more highlight on the textures so as to bring all elements together.

Step 12:
Finally add the sentiments and the bottle is ready.


Comments
Post a Comment